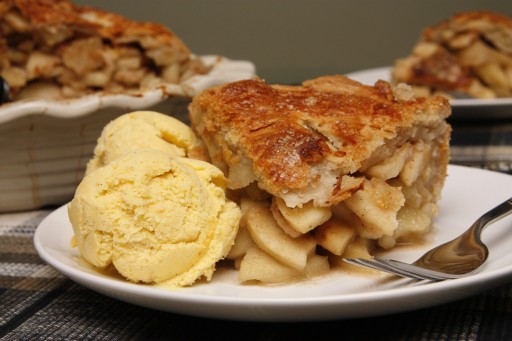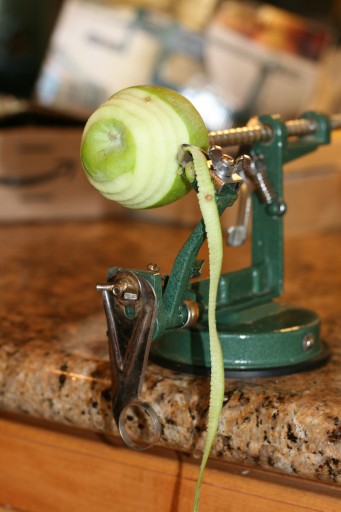
A friend of mine begged me to post this recipe before Thursday because she wants to make homemade apple pie as part of her Thanksgiving dinner this year. My husband loves, loves, loves, loves, loves this apple pie. Did I mention that he LOVES it? That said, he’s gone to Liberia for two weeks, so I promised that since he won’t get this pie for Thanksgiving, I’ll make it for him the day he gets back. I have to make sure he comes home somehow…I never appreciated all those years my mom made me apple pie when I was a kid. She made them look easy – one minute you requested apple pie, and an hour or so later, one appeared. I hadn’t thought about the fact that someone had to peel and core all those apples that were stuffed in that pie. I personally detest peeling apples, so I bought one of these. This cuts back on prep time tremendously! No worries if you don’t have one of these already and are looking to make pie NOW! Mom didn’t own fancy gadgets to peel those apples either! She peeled them by hand – and, in fact, to this day she still does!Just to clarify, there are two types of people in this world: those that like their apple pies to taste like loads and loads of fresh apples, and those that want their pie to be filled with a thick syrup like this. I fall into the first camp, and thus my pie has LOTS of apples and pops with the flavor of freshness with a hint of cinnamon and nutmeg. If you’re someone who likes apple pies laden with a thick, syrupy sauce, then this isn’t the pie for you. However, if you want to try a healthier and, in my opinion tastier, version of apple pie, then keep reading!
 This cuts back on prep time tremendously! No worries if you don’t have one of these already and are looking to make pie NOW! Mom didn’t own fancy gadgets to peel those apples either! She peeled them by hand – and, in fact, to this day she still does!Just to clarify, there are two types of people in this world: those that like their apple pies to taste like loads and loads of fresh apples, and those that want their pie to be filled with a thick syrup like this. I fall into the first camp, and thus my pie has LOTS of apples and pops with the flavor of freshness with a hint of cinnamon and nutmeg. If you’re someone who likes apple pies laden with a thick, syrupy sauce, then this isn’t the pie for you. However, if you want to try a healthier and, in my opinion tastier, version of apple pie, then keep reading!
I’ve used mom’s basic recipe and combined it with some elements of the many apple pie recipes from the book Pie to come up with this amazing pie recipe. Because of this, there are steps in this pie that are optional. They aren’t included in mom’s basic recipe, but are included in the Pie recipe. For this reason, try the pie both ways and see which you prefer more!
Ingredients
filling:
pastry for 9.5" double crust pie, refrigerated, divided into two halves
12 cups peeled, cored, and sliced apples (I used a mixture of Granny Smiths and Golden Delicious)
3/4 cup apple cider (optional)
1/2 - 3/4 cup sugar (based on how sweet your apples are)
2 tbsp all purpose flour
1/2 tsp grated lemon peel
1/2 tsp ground cinnamon
1/2 tsp ground nutmeg
pinch of salt
1 tbsp butter or margarine
glaze:
milk
sugar
Instructions
- If you haven't already, prepare the pastry and refrigerate until firm enough to roll, about 1 hour.
- On a sheet of lightly floured waxed paper, roll the larger portion of the pastry into a 13-inch circle with a floured rolling pin. Invert the pastry over a 9 1/2-inch deep-dish pie pan, center, and peel off the paper. Gently tuck the pastry into the pan, without stretching it, and let the overhang drape over the edge. Place in the refrigerator for 15 min.
- Prepare the apples.
- (Optional) Combine the apples and cider in a large pot. Bring to a boil, cover, and cook over relatively high heat for 5 minutes, stirring once or twice. Drain the apples, reserving the juice. Transfer the juice to a small saucepan and reduce over medium-high heat to 1/4 cup. Combine with the apples in a large bowl and let cool.
- Preheat the oven to 375. In a small bowl, combine the sugar, flour, zest, and spices.
- Whether you used the optional method or not, stir into the apples and set aside.
- On another sheet of lightly floured waxed paper, roll the other half of the pastry into an 11 1/2-inch circle. Turn the filling into the chilled pie shell and smooth the top with your hands. Dot the filling with the butter. Lightly moisten the rim of the pie shell.
- Invert the top pastry over the filling, center it, and peel off the paper. Press the top and bottom pastries together along the dampened edge. Poke several steam vents in the top of the pie with a fork or paring knife (or create an interesting design!).
- Using a pastry brush, brush the pie lightly with milk, then sprinkle with sugar.
- Place the pie on a cookie sheet in the center oven rack and bake for 30 minutes, then rotate the pie 180 degrees and cook for another 30 minutes. Note: If the pie starts to get too dark, cover with loosely tented aluminum foil for the last 15 minutes.
- Transfer to a wire rack and let cool for at least 2 hours before serving.
Schema/Recipe SEO Data Markup by ZipList Recipe Plugin
http://www.dishingthedivine.com/2009/11/24/moms-apple-pie/Copyright 2012 Dishing the Divine

1 response so far ↓
1 Mary Peyton // Nov 28, 2009 at 1:06 pm
Oh my goodness- that looks GORGEOUS!!! Bret made me peel some apples for an apple/persimmon chutney and it took forever! I need one of those fancy peelers!